After the tilt servo I could not even add the servo Pan. I added a servo to the base of the tilt webcam and modified the Arduino software Yun and HTML page.
I fixed the servo in an extremely professional way with a kitchen ties.
The Pan servo is linked to the pin number 6.
Clicking on the black-blue grid is possible to move pan-tilt servos toghether.
This is a short video of the "Kitchen Tray Project".
Version 3.0 of the kitchen tray project has the tilt camera control.
Touching the black stripe on the right side on the dashboard is possible to change the camera tilt position with seven possible positions.
The mechanical construction seems perhaps too complex for a JFFP (just for fun project) like this.
I did not build it now. I did it time ago to test a CNC that I builded.
Soon I will do a post about it.
A short video:
The servo is linked to the pin 11 of the Arduino Yùn.
After the program upload into the Arduino yùn you have to open the REST API ACCESS from the configuration menù.
At this point you are able to open the rover web page with a tablet or a PC linked on the same net.
You have to write the Arduino yùn IP plus "/sd/rover" on the web browser address bar.
For example my address is:
http://192.168.1.36/sd/rover/
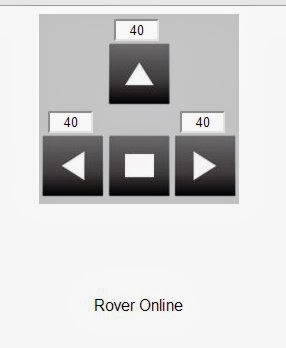
And the WEB ROVER page will come up.
The WEB ROVER page has some buttons to controll the rover and a status field. Numeric values are used to set the number of Arduino cycles during which the command will be executed. This meaning that with a 50 ms of loop delay, each command will be executed for 2 seconds.
This is a security function to avoid problems. In this way the rover stop it if the ethernet connectios fails.
In the next version I'm going to add an automatic control connection protocol.
The HTML code is mainly formed by two side:
a table with the buttons icons and some numeric field.
4 javascript functions. Two to send command and two to receive informations from the rover.
The sendCommand function send a HttpRequest (it's like write an address on a web browser and press enter) with address: IP/arduino/mode/3/40.
Thanks to web server and bridge library the Arduino sketch catch the string and from the string it get the numbers 3 and 40.
The code "richiesta.onreadystatechange = sendCommandResponse;" subscribes the answer from Arduino and tell that it will be managed by "sendCommandResponse" function.
I'm going to explain the first version of the Arduino sketch to control the rover with a web browser.
Arduino sketch has the goal to receive some commands from the web server and drive the servos according to commands. To do that I use the Bridge library to read commands from web server and Servo Library to drive the servos.
The Arduino Yùn board has:
"Arduino" microcontroller
micro PC on which "Linux run" and a web server .
wifi board.
I wrote the following Arduino sketch starting from the Bridge and Servo library that you can read here and here.
//include the library
#include <Bridge.h> #include <YunServer.h> #include <YunClient.h> #include <Servo.h> //comunication server declaration with the Linux side YunServer server; //Servo objects declarations Servo myservoL; Servo myservoR; //function mode variable (forward, left, right, stop) int mode; //timeout variable to avoid run without commands int timeout; //Arduino setup routine void setup() { //servo pins declaration myservoL.attach(9); myservoR.attach(10); //variables initialization mode=0; timeout=0; //set pin13 for debug function pinMode(13,OUTPUT); //start Bridge comunication with Linux Bridge.begin(); server.listenOnLocalhost(); server.begin(); } void loop() { digitalWrite(13, HIGH); //read commands from Linux YunClient client = server.accept(); if (client) { //if there is a message it tries to decode process(client); client.stop(); } //select actions to do according to current "mode" variable if (mode == 1) { gostraight(); } if (mode == 2) { turnleft(); } if (mode == 3) { turnright(); } if (mode == 4) { stopmode(); } //strobe alive led digitalWrite(13, LOW); //slow is better delay(50); } void process(YunClient client) { String command = client.readStringUntil('/'); if (command == "mode") { //if it's a "mode" command modeCommand(client); } if (command == "state") { //if it's a "state" command stateCommand(client); } } void modeCommand(YunClient client) { //change the function mode mode = client.parseInt(); if (client.read() == '/') { //set new timeout for the new function mode timeout = client.parseInt(); } //answer with current function "mode" and "timeout" client.print(mode); client.print(F("#")); client.print(timeout); client.println(""); } //answer with current function "mode" and "timeout" void stateCommand(YunClient client) { client.print(mode); client.print(F("#")); client.print(timeout); client.println(""); } //exec go forward command mode void gostraight() { if (timeout > 0) { myservoL.write(-180); myservoR.write(180); timeout = timeout -1; } else { stopmode(); } } //exec turn left command mode void turnleft() { if (timeout > 0) { myservoL.write(180); myservoR.write(180); timeout = timeout -1; } else { stopmode(); } } //exec turn right command mode void turnright() { if (timeout > 0) { myservoL.write(-180); myservoR.write(-180); timeout = timeout -1; } else { stopmode(); } } //exec stop command mode void stopmode() { myservoL.write(90); myservoR.write(90); timeout = 0; mode=0; }
In the next post I will talk about the web server Linux.
New rules from ENAC (Italian Civil Aviation Authority) seem to forbid the FPV. The situation isn't yet clear. But in meantime...
Like water that seeps into every crevice and find new ways to satisfy his nature I decided after some googling to build a web video controlled rover.
I built something similar some time ago. It was a little rower with three wheels and was the terrestial father of the TZagi plane that I described in the post "Confession of an FPV pilot".
I modified two model servos for continuos rotation and I added a surveillance camera with a 2,4 GHz trasmitter. I linked the video reciver to the TV in my living room and I drow the rover that was in my garden with an old two channel model transmitter.
I never saw my garden from that point of view. It was a new place. A little planet full of mysteries. There were huge monsters like cats, hens and hedgehog. It was a videogame with which I could lose myself for hours. It was 1997 and I followed with passion the events about Mars Pathfinder project. In those days was born my wish to build a little personal rover.
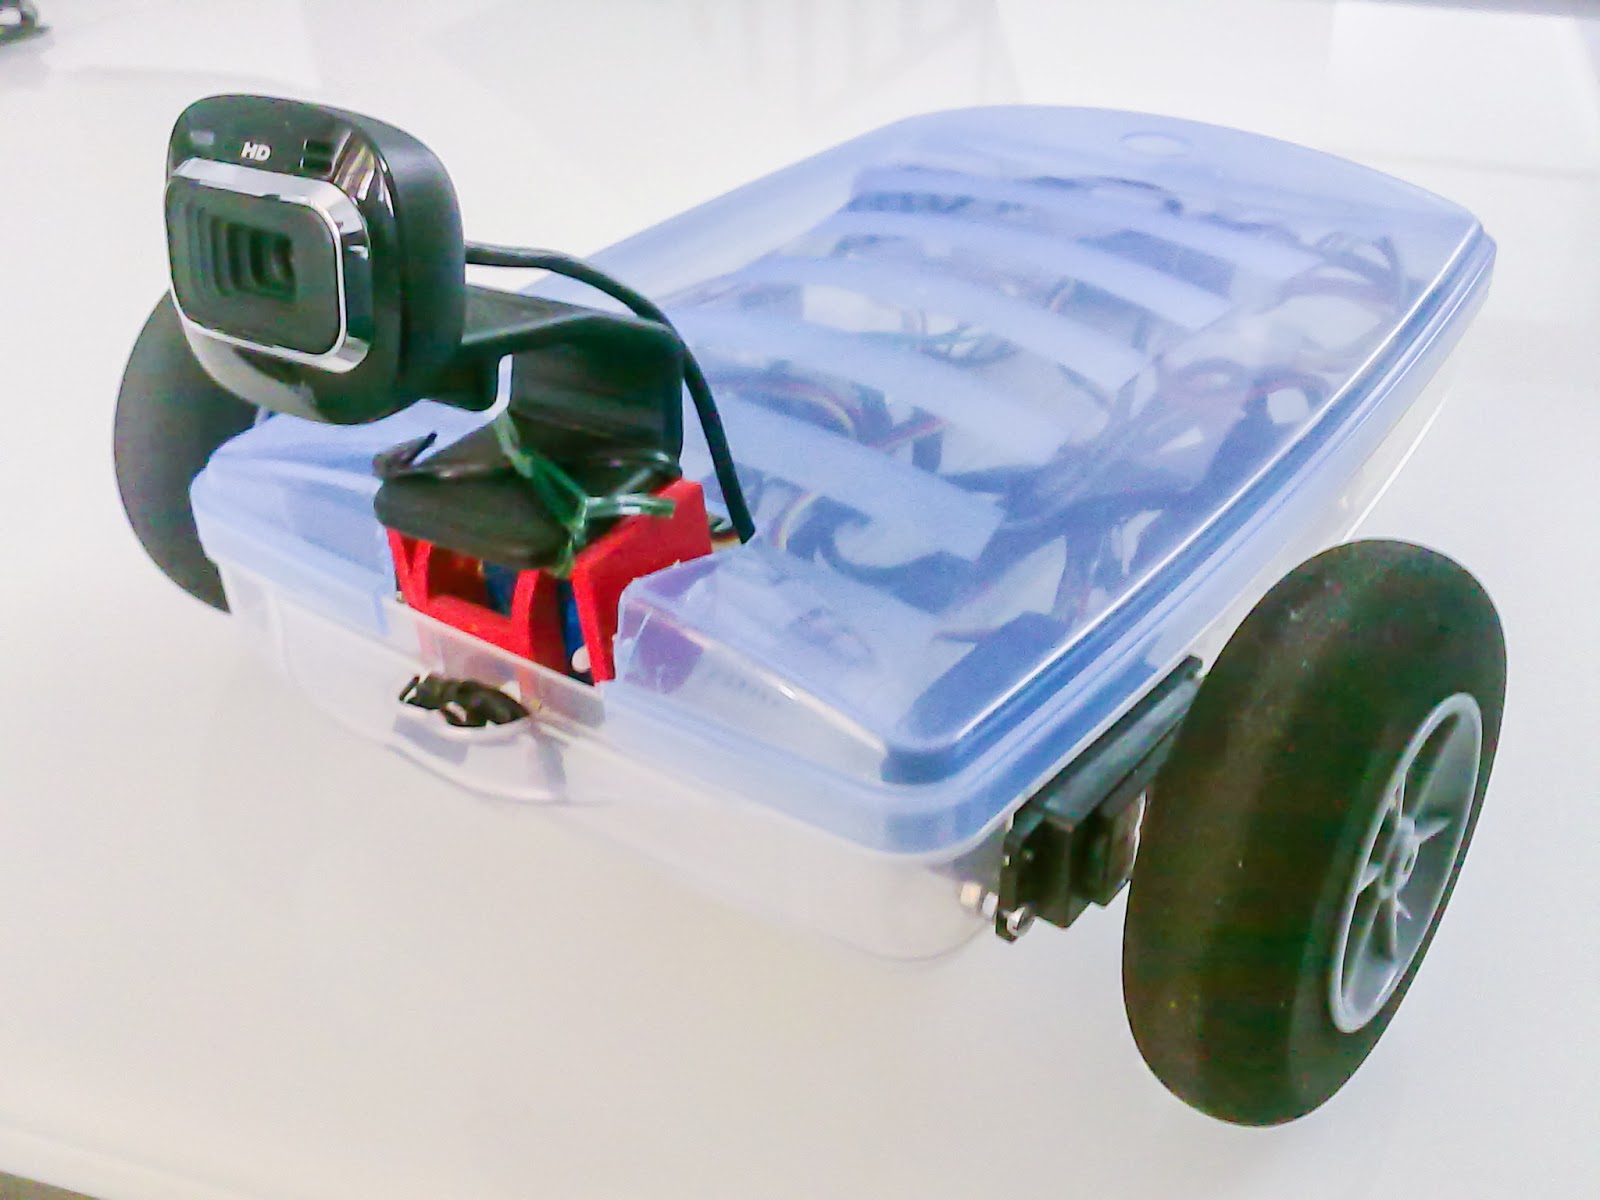
I know! It is very nasty now and I think I'll have to work hard on design.
I got some parts from my planes and I stole a plastic tray from the kitchen to have a board where place a bunch of components that allow me to develop the software.
The rover has:
Versione Italiana My english is not very good. I appreciate corrections and suggestions.
Thanks in advance.
Stefano
Same days ago I was walking randomly on the web. After a while I saw a couple of 9.
When three number 9 are placed after a number 1, in my brain a big lamp switch ON.
A big flow of memories and feelings came out. I confess, my eyes was wet.
It was 1976 and I think that my passion for science fiction was born in that year.
My TV was black and white but with SPACE: 1999 the difference was minimal.
SPACE: 1999 was different from anything I had seen before. The beauty of Moonbase Alpha and its Eagles hid to my children eyes all scientific errors in the series. For me it was all utterly believable, indeed true!
But this time was different. There wasn't the number 1 in front of the 9 but the number 2 followed by 099. Also, not far away, the word "remake". I was literally blown up on my chair.
With false calm, I went back I sat down and I began to search and search and search.
The only news I could find, dates back to February 22, 2012 where it was announced the intention to produce the remake. Then nothing and also in the official site there is not any news.
The rain continued to fall for days and then, after the construction of the hammer cam, I threw in the construction of the "Hydraulic saw"
Here are some photos of the stages of construction: