Saturday, November 19, 2016

CARGO CULT, the interview.

No, not today, I will not speak  about CARGO Cult game.

Some time you need to take a break, a break to turn back and look ....

A few days ago I had the pleasure of being interviewed by one of the most authoritative sites in the Italian panorama of videogames.

I'm talking about PuntaeClicca, It's also present on Facebook.


Alessandro, the person behind PuntaeClicca was able, with his questions, to create an ideal atmosphere.

But I will not dwell too much and I invite you to read the article located here.


What can I say ...These are satisfactions !!

Sunday, November 6, 2016

CARGO CULT gameplay

The gameplay of this game could be defined as  a pure point-and-click.
There are no dialogues except these that the protagonist do with himself, this partly because of the nature of the game. He is alone on an island and he knows virtually nothing.
About the  programming stuf of the game logic I just thought about putting a contextual comment about the situation and progress level in history at the end of each movement of the protagonist. These comments are sometimes generic and sometimes targeted to steer you in the right direction the game.
Tips are sometimes my quotes or from famous people. Tips are somehow related to the situation and the theme of the game.

Progress in the game is defined by some variables related to the resolution of the puzzles.

Even the ability to move between the scenes is updated from time to time, restricted or enabled as a function of the resolution of the puzzles. For example, once you find the way out of "endless beaches" of the first level of the first chapter, you can no longer go back.

Technically speaking, saving the game variables is done at the level of JavaScript with the functions:

localStorage.setItem ( 'enigma1', '1');
localStorage.getItem ( 'enigma1', '1');

 Since this is a html + js application that runs within an app Android you must add the following ratings in webview android:

webview.getSettings (). setDatabaseEnabled (true);
webview.getSettings (). setDomStorageEnabled (true);

Without these enabling the localStorage feature would not work.

A short gameplay example of "Cargo Cult"


 CARGO Google Play

Saturday, October 8, 2016

CARGO CULT A walk on the set

It's time to join the "Steve" .gif animations with the Javascript code of the previous post.

First I have to get with Gimp, the 4 images necessary to allow Steve to move freely back and forth.

You also need to make some changes to the JavaScript code (which I shared a few posts ago) to load the gif and png steve at the right time.

function addSteve(aspect)
{
if (steve==null){
steve = new Image();
steve = document.createElement('img');
steve.id = 'steve';
steve.setAttribute("src", aspect);
steve.style.cssText = 'position:absolute;top:'+steveTop+'%;left:'+stevePosX+'%;height:'+steveHeight+'%;width:auto;pointer-events:none;opacity:1;z-index:100;';
document.body.appendChild(steve);
}else{
steve.style.cssText = 'position:absolute;top:'+steveTop+'%;left:'+stevePosX+'%;height:'+steveHeight+'%;width:auto;pointer-events:none;opacity:1;z-index:100;';
}
}

function startWalking()
{
if (steve!=null){
useWith='';
stopWalking();
if (parseFloat(steve.style.left) > steveMoveToX){
steveMoveDir = "left";
steveAspect = "img/mainfigure/steveleft.gif";
}else{
steveMoveDir = "right";
steveAspect = "img/mainfigure/steveright.gif";
}
steve.setAttribute("src", steveAspect);
myWalk = setInterval(walkHandler, 30);
}
}

function stopWalking()
{
clearInterval(myWalk);
if (steveMoveDir == "left"){
steveAspect = "img/mainfigure/steveleftstand.png";
}else{
steveAspect = "img/mainfigure/steverightstand.png";
}
steve.setAttribute("src", steveAspect);
}

And the "game" is done !!
I'm kidding...

Here the code.

In fact we are not even 1% of the work needed to get the publication on Play Store or at least that's what I would say thinking about the work I did to get to publish the game CARGO Cult.


 CARGO Google Play

Saturday, October 1, 2016

CARGO Project Walking gif

It was not easy and in any case I'm not yet satisfied.
Make a character animation gif walking in a credible way is perhaps one of the things less successful in my adventure into the world of game creation.
I have tried in many ways and the result you can see it in the game that I posted on Playstore (bottom of the page you find the links).
A few days ago I found an interesting link that today I want to try and document in parallel with this post. So if the result will be good, I will publish an update of the game with the new character who walks decently.
I'm not going to follow the instructions of the link literally but I will take what I think is most interesting.

This is the link:

http://www.spriteland.com/tutorials/animating-a-walk-cycle-in-inkscape-part-1.html

I'll use Inkscape and Gimp. First of all We have to set the working area Inkscape in File>Proprietà del documento


We need to draw all the body parts of our "steve":


And I'll adjust all body parts best I can.


Always following the link instructions, I draw some points. These points  are used to correctly position the legs and arms. To do this add a higher level and drawing the guide points in this new level.


Now you have to place the legs and arms following the instructions of the link, then follow the guidelines. In my case, I prefer to create a new layer for each frame duplicating each time levels. This way I have more control over any unwanted movement of the body parts.


At the end I have got 8 levels. At this point I have only to export one by one the eight levels as a .png.


I import all images as a separate level in Gimp:


Finally export as .Gif with the following settings:


And here is our "steve" walking ..


 CARGO Google Play

Monday, September 12, 2016

CARGO Project The main character of the game

Probably, the first brick for the construction of a game of this type is the protagonist.
Usually equipped with a superhuman patience, it obeys your every request.
Often walking, and sometimes speaks, he collects objects and performs actions that often surprise you (or rather should surprise you).
Specifically my actor whith I named "steve" moves only left or right.

The javascript code that drives the protagonist to be included in the file index.js:

Let's start by defining some global variables:

var steve;
var steveAspect = 'img/mainfigure/man.png';
var steveHeight = 22;
var steveWidth;
var stevePosX = 50;
var steveTop = 60;
var myWalk;
var steveMoveToX;
var steveMoveDir;
var steveSpeed=0.3;

and the starting function:

window.onload=function(){
load();
};

function load(){
setNewscene('img/scnr1/S0.jpg'); //carico una immagine di fondo
addSteve(steveAspect); //creo il protagonista
document.getElementById("backImg").addEventListener("mouseup", goWalk, false);
}

function setNewscene(sceneName)
{
document.getElementById("backImg").setAttribute("src", sceneName);
}

function addSteve(aspect)
{
if (steve==null){
steve = new Image();
steve = document.createElement('img');
steve.id = 'steve';
steve.setAttribute("src", aspect);
steve.style.cssText = 'position:absolute;top:'+steveTop+'%;left:'+stevePosX+'%;height:'+steveHeight+'%;width:auto;background-color:blue;pointer-events:none;opacity:1;z-index:100;';
document.body.appendChild(steve);
}else{
steve.style.cssText = 'position:absolute;top:'+steveTop+'%;left:'+stevePosX+'%;height:'+steveHeight+'%;width:auto;background-color:blue;pointer-events:none;opacity:1;z-index:100;';
}
}

the following function will be executed after the mouseup event:

function goWalk(e) {
steveMoveToX = parseFloat((e.clientX-this.offsetLeft) / this.offsetWidth * 100);
steveWidth = parseFloat($("#steve").width() / this.offsetWidth * 100)/2;
startWalking();
}

I check if  "steve" is not null and the direction to go; dx o sx.

function startWalking()
{
if (steve!=null){
useWith='';
stopWalking();
if (parseFloat(steve.style.left) > steveMoveToX){
steveMoveDir = "left";
steveAspect = "img/mainfigure/man.png";
}else{
steveMoveDir = "right";
steveAspect = "img/mainfigure/man.png";
}
myWalk = setInterval(walkHandler, 30);
}
}

function stopWalking()
{
clearInterval(myWalk);
}

and now I move "steve" to the mouseup click point.

function walkHandler()
{
if (steveMoveDir == "left"){
if (parseFloat(steve.style.left) > (steveMoveToX - steveWidth)){
stevePosX = (parseFloat(steve.style.left) - steveSpeed);
steve.style.left = stevePosX + "%";
}else{
stopWalking();
}
}else{
        if (parseFloat(steve.style.left) < (steveMoveToX - steveWidth)){
stevePosX = (parseFloat(steve.style.left) + steveSpeed);
steve.style.left = stevePosX + "%";
}else{
stopWalking();
}
}
}

And this is our  "steve" (red rect) moving on the scene


Here you can find all files.


 CARGO Google Play


Monday, September 5, 2016

CARGO Project - Project structure

Here begins a series of posts describing the process of creating the game both technically and creatively.
I do not pretend to say that the structure of this project is the best for the kind of game that I made but I would only describe as I have done.
Advice and constructive suggestions are indeed necessary I agree.
I made this game in HTML and Javascript, thinking immediately to incorporate them into a web app Android.

    So the whole game except for some small details can run on any modern browser.
    Specifically, I used Chrome.


    The HTML page it is really minimal:

    <!DOCTYPE html>
    <html lang="en">
    <head>
         <meta charset="utf-8">
         <meta name="game" content="myGame">
         <meta name="fpwing" content="fpwing">
    </head>
    <body id='mybody' style='background-color:#000000;opacity:1'>
    <img id='backImg' style='position:fixed;top:0%;left:0%;width:100%;height:88%;z-index:60;'/>

    <div id="collectedObjs" style='position:absolute;top:88%;left:0%;height:12%;
                           width:100%;opacity:1;color:Black;z-index:60;background-color:#000000;' >
                    </div>

    <div id='msgPopUp' style='position:absolute;top:0%;left:0%;height:15%;width:90%
                           ;opacity:1;z-index:100;'>
                    </div>
    </body>
    <script type="text/javascript" charset="utf-8" src="js/jquery-2.2.3.min.js"></script>
    <script type="text/javascript" charset="utf-8" src="js/index1.js"></script>
    </html>

    There are references to js libraries and the main project tag on which the whole game is played.

    In the next post we will see the javascript code and I will try to describe in simple terms the functioning of the basic game mechanics as the protagonist movement and the objects collection and interaction with  the scene.

    The free project that contains the first chapter can be downloaded from the Play store at this address


     CARGO Google Play


    Saturday, September 3, 2016

    CARGO Project

    According to Garcia Lorca, there are 3 things that every person should do in life:


    • HAVE A CHILD.
    • WRITE A BOOK.
    • PLANT A TREE.


    I basically agree but according to my personal way of seeing things, the dear Garci inexplicably forgot one thing:


    • MAKE A POINT AND CLICK GRAPHIC ADVENTURE.


    Do you remember the "Monkey Island"? if you do not know what I'm talking about, you can also click anywhere else: - (((((

    It was 1990 when in a typical day, I do not remember how and why, I installed on my first computer "IBM compatible" a new game. It was called "The Secret of Monkey Island".
    I did not know much of the game and did not inspire me particularly, but only a few days later, had become my happy thought fixed. It had become my secret garden. A place to live another life, a temporary escape from everyday life. Then I played with "LeChuck's Revenge" and all other LucasArts masterpieces. I remember with emotion "Amerzone" and "Syberia" Benoît Sokal. Remember "Atlantis" of Microid and "brokens Sword" software revolution, "Blade Runner" by Westwood Studios.

    Then a few months ago, in a creative moment, I realized that I had the knowledge and ability to create in a reasonable time a graphical point and click type adventure.

    So exploiting deeply my medium graphics capabilities and programming that I have accumulated over time, I began to imagine how he could be the new "thing" and especially began to enjoy the pleasure and satisfaction to make this happen.

    Here are some pictures of the project being developed:


    Yes, it is true, the graphics could be cured but it is just the beginning.


    And as they say those guys in Hollywood when they advertise their job:


    STAY TUNED - IT'S COMING - SOMETHING BIG IS COMING - WHAT'S NEXT e bla bla bla...

    and this is my TEASER TRAILER:


     CARGO Google Play


    Tuesday, March 4, 2014

    Confessions of a FPV pilot. The rover - Part 6

    After the tilt servo I could not even add the servo Pan. I added a servo to the base of the tilt webcam and modified the Arduino software Yun and HTML page.


    I fixed the servo in an extremely professional way with a kitchen ties.


    The Pan servo is linked to the pin number 6. 


    Clicking on the black-blue grid is possible to move pan-tilt servos toghether.  


    This is a short video of the "Kitchen Tray Project".


    All project files are here.

    Saturday, February 22, 2014

    Confessions of a FPV pilot. The rover - Part 5

    Version 3.0 of the kitchen tray project has the tilt camera control.
    Touching the black stripe on the right side on the dashboard is possible to change the camera tilt position with seven possible positions.


    The mechanical construction seems perhaps too complex for a JFFP (just for fun project) like this. 
    I did not build it now. I did it time ago to test a CNC that I builded.
    Soon I will do a post about it.


    A short video:


    The servo is linked to the pin 11 of the Arduino Yùn.


    All "Kitchen Tray Project 3.0" file are here.

    Monday, February 17, 2014

    Confessions of a FPV pilot. The rover - Part 4


    This is the first video of the Rover 2-0.


    To install and configure the web cam I used the instruction from this blog www.lucadentella.it. 
    It exactly what I was looking for and it's really clear and complete.
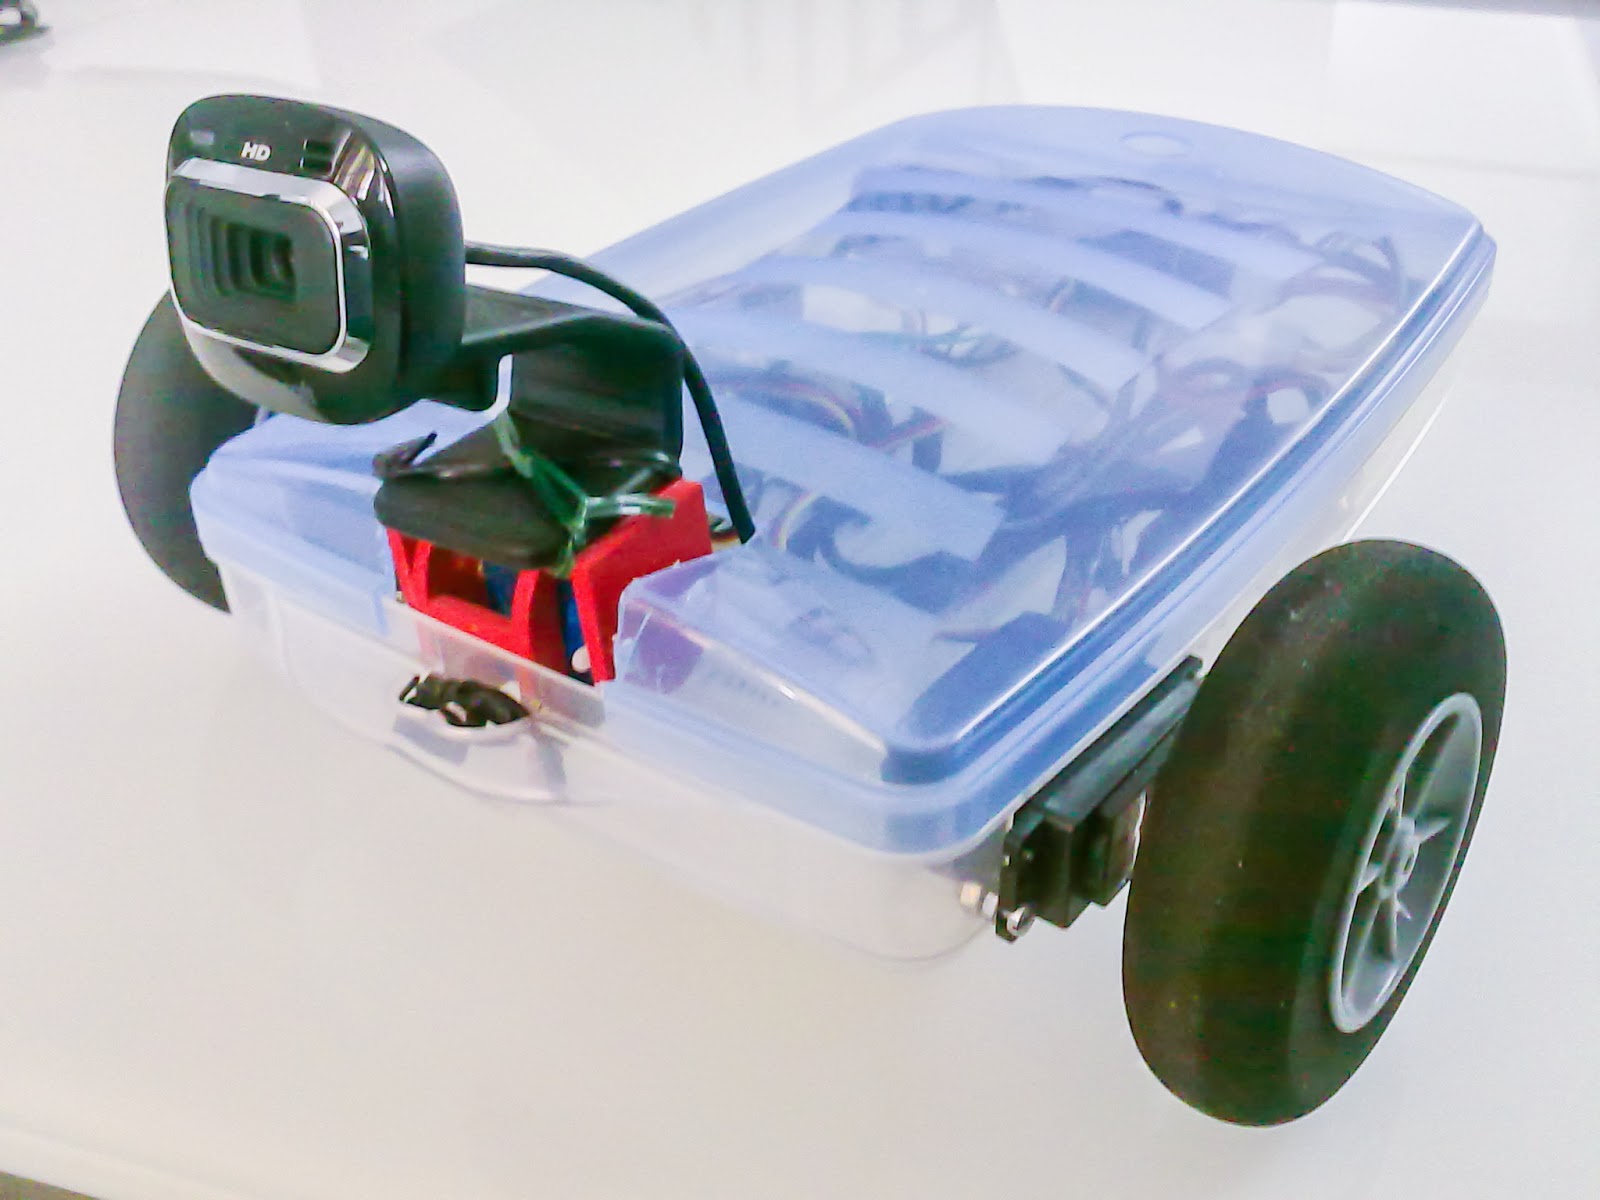
    I bought the LifeCam HD-3000 and this is the result:.


    All project files are here.
    There are some improvements in the arduino Yun sketch and in the web server html page.
    I also added some values to adjust the wheels' speed.
    In the next post I'm going to add webcam pant/tilt.


    Sunday, February 9, 2014

    Confessions of a FPV pilot. The rover - Part 3

    This is a short video of the very first version of the rover that I choose to call "Kitchen Tray Project "


    You can download all project files here.

    These are the instructions to hack the servos and below you can see the electrical links.


    After the program upload into the Arduino yùn you have to open the REST API ACCESS from the configuration menù.


    At this point you are able to open the rover web page with a tablet or a PC linked on the same net.
    You have to write the Arduino yùn IP plus "/sd/rover" on the web browser address bar.
    For example my address is:

     http://192.168.1.36/sd/rover/


    And the WEB ROVER page will come up.


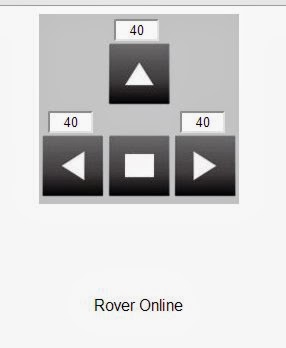
    The WEB ROVER page has some buttons to controll the rover and a status field. Numeric values are used to set the number of Arduino cycles during which the command will be executed. This meaning that with a 50 ms of loop delay, each command will be executed for 2 seconds.
    This is a security function to avoid problems. In this way the rover stop it if the ethernet connectios fails.
    In the next version I'm going to add an automatic control connection protocol.

    The HTML code is mainly formed by two side:
    • a table with the buttons icons and some numeric field.
    • 4 javascript functions. Two to send command and two to receive informations from the rover.

    <input type="text" style="text-align: center" size="2" name="timeL" value="40" id="timeL" /><br>
    <img src="left.jpg"  id="timeLimage" onclick="sendCommand(3,document.getElementById('timeL').value);"/>

    When you press a buttont, the send Command function will be executed. This function has two parameters, the 3 and the 40 for text value

    function sendCommand(mode,time)
    {
              document.getElementById("info").innerHTML = "sent command >>>";
              server = "/arduino/mode/" + mode + "/" + time;
              richiesta = new XMLHttpRequest();
              richiesta.onreadystatechange = sendCommandResponse;
              richiesta.open("GET", server, true);
              richiesta.send(null);
    }

    The sendCommand function send a HttpRequest (it's like write an address on a web browser and press enter) with address: IP/arduino/mode/3/40. 
    Thanks to web server and bridge library the Arduino sketch catch the string and from the string it get the numbers 3 and 40.

    The code "richiesta.onreadystatechange = sendCommandResponse;" subscribes the answer from Arduino and tell that it will be managed by "sendCommandResponse" function.

     function sendCommandResponse()
    {
              if ((richiesta.readyState == 4) && (richiesta.status == 200))
                 {
                 esito = richiesta.responseText;
                 document.getElementById("info").innerHTML = esito;
                 response = esito.split("#");
                 document.getElementById("info").innerHTML = response;
                 mode = response[0];
               Ardumia67timeout = response [1];
                 }
    }   

    That function "sendCommandResponse" refresh the string state field.

    In the next post I'm going to add a webcam to the rover.

    Tuesday, February 4, 2014

    Confessions of a FPV pilot. The rover - Part 2

    I'm going to explain the first version of the Arduino sketch to control the rover with a web browser.

    Arduino sketch has the goal to receive some commands from the web server and drive the servos according to commands. To do that I use the Bridge library to read commands from web server and Servo Library to drive the servos.
    The Arduino Yùn board has:
    • "Arduino" microcontroller 
    • micro PC on which "Linux run" and a web server . 
    • wifi board.

    I wrote the following Arduino sketch starting from the Bridge and Servo library that you can read here and here.

    //include the library

    #include <Bridge.h>
    #include <YunServer.h>
    #include <YunClient.h>
    #include <Servo.h>

    //comunication server declaration with the Linux side 
    YunServer server;

    //Servo objects declarations 
    Servo myservoL;
    Servo myservoR;

    //function mode variable (forward, left, right, stop)
    int mode; 
    //timeout variable to avoid run without commands
    int timeout;

    //Arduino setup routine
    void setup() {
    //servo pins declaration
      myservoL.attach(9);
      myservoR.attach(10);

    //variables initialization
      mode=0;
      timeout=0;

    //set pin13 for debug function
      pinMode(13,OUTPUT);

    //start Bridge comunication with Linux
      Bridge.begin();
      server.listenOnLocalhost();
      server.begin();
    }

    void loop() {
      digitalWrite(13, HIGH);
      //read commands from Linux
      YunClient client = server.accept();
       if (client) {
       //if there is a message it tries to decode
        process(client);
        client.stop();
      }
      //select actions to do according to current "mode" variable
      if (mode == 1) {
        gostraight();    
      }
      if (mode == 2) {
        turnleft();
      }
      if (mode == 3) {
        turnright();
      }
      if (mode == 4) {
        stopmode();
      }
      //strobe alive led
      digitalWrite(13, LOW);
      //slow is better
      delay(50); 
    }

    void process(YunClient client) {
      String command = client.readStringUntil('/');
      if (command == "mode") {
       //if it's a "mode" command 
        modeCommand(client);
      }
      if (command == "state") {
       //if it's a "state" command
        stateCommand(client);
      }
    }

    void modeCommand(YunClient client) {
    //change the function mode
      mode = client.parseInt();
      if (client.read() == '/') {
       //set new timeout for the new function mode
        timeout = client.parseInt();
      }
      //answer with current function "mode" and "timeout"
      client.print(mode);
      client.print(F("#"));
      client.print(timeout);
      client.println("");
    }   

     //answer with current function "mode" and "timeout"
    void stateCommand(YunClient client) {
      client.print(mode);
      client.print(F("#"));
      client.print(timeout);
      client.println("");
    } 

    //exec go forward command mode
    void gostraight() {
      if (timeout > 0) {
        myservoL.write(-180);
        myservoR.write(180);
        timeout = timeout -1;
      }
      else {
        stopmode();  
      }
    }

    //exec turn left command mode
    void turnleft() {
      if (timeout > 0) {
        myservoL.write(180);
        myservoR.write(180);
        timeout = timeout -1;
      }
      else {
        stopmode();  
      }
    }

    //exec turn right command mode
    void turnright() {
      if (timeout > 0) {
        myservoL.write(-180);
        myservoR.write(-180);
        timeout = timeout -1;
      }
      else {
        stopmode();  
      }
    }

    //exec stop command mode
    void stopmode() {
        myservoL.write(90);
        myservoR.write(90);
        timeout = 0;
        mode=0;  
    }

    In the next post I will talk about the web server Linux.


      Hobbies Blogs - Blog Rankings